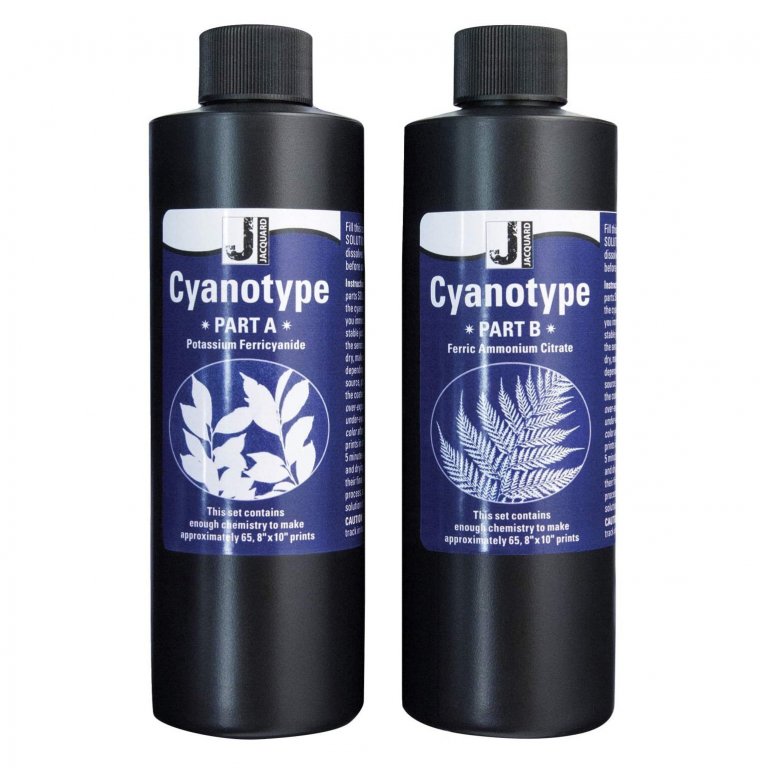
Photographic exposure process based on UV rays
For sun fans who like to experiment
Suitable for paper and natural fibers
| Location in Store | G1F11B |
|---|---|
| Article No. | 3014776-SET |
| Content | 2 bottles (components A + B) |
| Suitable surfaces | any natural fiber, porous surface, including cotton, linen, silk, canvas, wool, paper, wood and leather |
Cyanotype is one of the first photographic techniques. Discovered in 1842, it is known into the 20th century as a popular low-cost method for reproducing photographs, documents, maps and plans ("blueprints"). It can also be used to record biological specimens in the field ("photograms").
Cyanotype harnesses the power of the sun and it can be used to make detailed prints of virtually any object: Tools, toys, plants, leaves, stones, sand, string, lace, etc. Simply place the object on the sensitized surface and expose it to sunlight (UV). Instead of objects, digital prints can also be used as a photographic negative, such as an inverted black and white photo inkjet print on transparent paper, to create full resolution photos on paper or fabric. Ideal for photographers, artists, graphic designers, quilters and more.
Plus, the cyanotype process is easy, forgiving, fast, magical and fun. Captures the nuance of every shadow - a fun group activity for all ages!
The kit is enough for about 50 A4 size prints or about 6 square feet of fabric. To get started, follow these steps:
- Fill bottles A and B with water. Then shake them well and wait about 24 hours to make sure that the powder has dissolved completely. If the water hardness in your area is high, we advise you to use distilled water.
- Provide dim light and mix component A with component B in a 1:1 ratio. The light-sensitive solution you get will keep for about 2 to 4 hours.
- Coat the fabric or paper you want to print on and then let it dry in a dark place. You can repeat the process for the most intense results. For textiles, there is no reason not to immerse them completely in the solution.
- Place the object or negative on your paper or fabric. If necessary, you can use needles or a glass plate to fix it. Then the whole thing goes into the sun or is otherwise exposed to UV light. The process can take up to 30 minutes depending on the intensity of the light.
- To develop your prints, all you need is a bucket of cold water. Rinse the work in it for at least 5 minutes. Do not use detergent or soap and change the water until it remains clear.
- Let the results dry on a line or paper. Oxidation will reveal the typical blue within 24 hours. Tip for those in a hurry: If you dip the prints in diluted hydrogen peroxide solution after rinsing and then rinse them again thoroughly with water, you can speed up the process.
Achtung, (VOC-Gehalt = 0,0 %), Ferric Ammonium Citrate =>99 %, Eye Irritation, Category 2A, Skin Irritation, Category 2, Specific Target Organ Toxicity - single exposure, Category 3
- H315: Causes skin irritation.
- H319: Causes serious eye irritation.
- H335: May cause respiratory irritation.
- P261: Avoid breathing dust / fume / gas / mist / vapours / spray.
- P264: Wash … thoroughly after handling.
- P271: Use only outdoors or in a well-ventilated area.
- P280: Wear protective gloves / protective clothing / eye protection / face protection.
- P302+P352: IF ON SKIN: Wash with plenty of water / …
- P304: IF INHALED:
- P305+P351+P338: IF IN EYES: Rinse cautiously with water for several minutes. Remove contact lenses, if present and easy to do. Continue rinsing.
- P312: Call a POISON CENTER / doctor / … if you feel unwell.
- P321: Specific treatment (see … on this label).
- P332+P313: If skin irritation occurs: Get medical advice / attention.
- P337+P313: If eye irritation persists: Get medical advice / attention.
- P362: Take off contaminated clothing.
- P403+P233: Store in a well-ventilated place. Keep container tightly closed.
- P405: Store locked up.
- P501: Dispose of contents / container to …
Free standard delivery within Germany and free collection from Modulor in Berlin for orders over 89 €.
5,95 € shipping costs, if order value is less than 89 € (DE)
2,95 € for pick-up at the store in Berlin, if order value is less than 89 €
Express and forwarding shipping
From 19 € express surcharge you will receive your order particularly quickly with standard shipping within Germany.
From 69€ is the cost of shipping within Germany. You can recognize articles with forwarding shipping in the store by the truck symbol .
Especially for Berlin
From 34.90 € courier shipping for standard and forwarding goods.
- Free returns for standard shipping within Germany
- Extended, voluntary return policy of 30 days for complete, undamaged goods in their original packaging
- You are responsible for the cost of returns for forwarding goods and returns from a country outside Germany
Excluded from returns
Excluded from returns are sections of rolled goods, cut-to-size pieces and other goods made especially for you, as well as used goods, newspapers, magazines and periodicals, Modulor vouchers and items that we do not carry in our range but have ordered at your request.
Good to know: The furniture variants in our configurators that can be delivered quickly are not cut to size, but standard formats that can be returned.