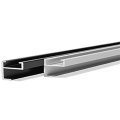
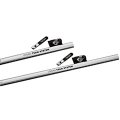
Picture & Gallery Hanging Tracks
Picture rails and gallery rails for professional picture hanging
Gallery rails are primarily used where the positioning of images of different sizes and formats is subject to frequent changes. Galleries and museums appreciate picture rails because of their flexible and comparatively simple assembly and their fast and very variable adaptation to the exhibition works. In addition to art rooms, picture rails are also very popular in business premises, exhibition stands, apartments, universities and schools. Once mounted on the wall, their rope construction with glides and picture hooks allows the quick and uncomplicated exchange of pictures. In the medium term, this flexibility not only saves money, but also the walls and presentation areas in front of which the pictures can be seen: Fewer drill holes and fewer nails and hooks ultimately lead to walls that are largely undamaged.
Mounting a picture rail
The picture rail system or gallery rail system usually consists of a rail, sliding hooks, suspension ropes and picture hooks. The rail is usually attached to a wall or presentation area and does not have to be removed for changing pictures.
For a two metre long rail, about six so-called fastening clips should be distributed evenly over the entire length. The clips are screwed to the wall with the flat side and with dowels and screws. The gridding of the clips allows the compensation of possible unevenness of the wall surfaces. In this way, the gallery rail can be fixed at various distances from the wall. The rail should be attached at an angle and pushed onto the clips with light pressure.
In order to connect several rails with each other, so-called rail connectors and corner connectors are inserted between individual rails. In this way, a rail system can be quickly and easily extended over entire walls and rooms.
The question which weight a picture rail can carry depends on several factors and unfortunately cannot be answered in general. The condition of the brickwork plays a decisive role. In addition, it is also worthwhile to consider beforehand what one orients oneself by in one's measurements or where one attaches one's new gallery rail. Exactly with spirit level aligned picture rails directly below an inclined ceiling look for example inclined, why their positioning should be adapted accordingly.
Flexible rope construction with glides and hooks
Picture and gallery rails have a (C) profile opened downwards, into which so-called sliding hooks are suspended. These can be moved flexibly within the rail, which is why it is easy to react to images of different widths with them. Ropes are attached to the sliding hooks with a loop. Instead of ropes and sliding hooks, cords can also be used, at the end of which a stirrup glider or disc glider is already pressed into the profile for guidance. In this way, the connection to the rail is somewhat more elegant and inconspicuous.
While both the classic sliding hooks and the disc gliders are hooked into the side of the rail, the so-called stirrup glides can be inserted from below at any point of the profile. Due to this variable suspension, we recommend stirrup gliders for interconnected and thus very long rail constructions. This makes it considerably easier to arrange and rehang the movements.
In order to finally attach a picture or its frame to the rope suspension, so-called picture hooks are required. These can be moved along the rope and are fixed to it by means of a screw mechanism. The variable height adjustable hooks make it possible not only to position pictures horizontally, but also to hang them at an angle. In addition, several pictures can be hung among each other. So nothing stands in the way of the so-called Petersburg hanging.
The adjustment of the picture hooks to the correct height and the subsequent hanging up or attaching of a picture can definitely be done by one person. With a little practice and the right measuring tools, the positioning is not too difficult works alone feasible. Essential for this is a spirit level, a measuring tape and some cardboard spacers for measuring the height of the picture hooks.
